Tuesday 31 July 2012

French Disaster in the PBEM Campaign

2nd French corps surrender at Possneck

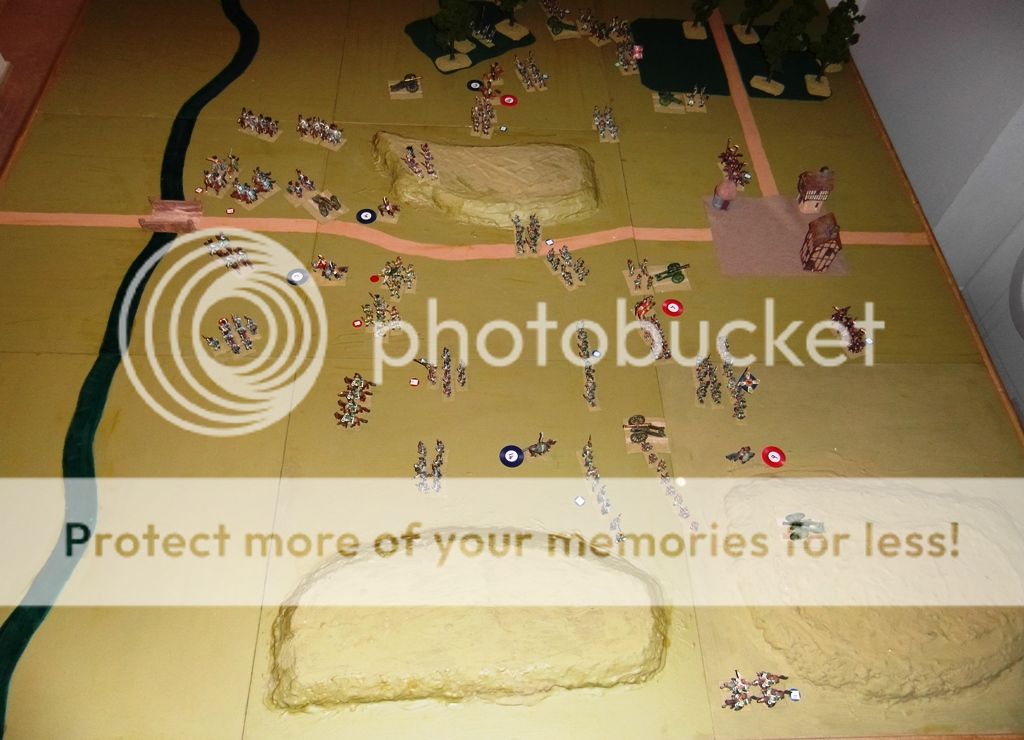
My worries about the player commitment in the PBEM campaign proved to be unfounded.   The campaign picked up again after the long break to fight the three battles.   These were the result of the three French corps all attempting to establish themselves east of the river Saale at the same time.   The Russians counter attacked and the result was three battles all starting on move 2 of the campaign.

The French suffered a major defeat, and were driven back in the centre.   The north held, and the south decided it was wiser to withdraw to the west bank the next morning.  They were attacked as they before they could do so.   The resulting battle was pretty even.  Both corps had only suffered light casualties the previous day, and the French were able to redeploy with their backs to the river before the Russians could reach them.

However the adjacent Russian corps commander sent one of his three divisions to “march to the sound of the guns”.   This was unexpected by both the French and Russian commanders involved in the fighting, and the first they knew of it was when the new division arrived on the French left flank.

With six divisions already fighting on the table there was not a lot of space for the new arrivals to deploy.   They attacked the French left flank, and sent their cavalry south to secure the only bridge over the river Saale and prevent the French retreating.

With odds of four to three the end was entirely predictable.  The French fought to hold the Russians until night, when they could slip back over the river under cover of darkness.  Bu t just before the end of the battle the Russian cavalry reached the bridge and defeated the French cavalry sent to hold it.

Meanwhile the French were fighting to withdraw to the bridge.    They lost heavily, particularly amongst the rear guard.   A mass of French cavalry and infantry were struggling to cross the bridge when the Russian cavalry arrived.    The French commander acknowledged defeat and surrendered.

It is the first time in more than 40 years war gaming that a game has ended in the surrender of a whole corps.  It is not the sort of thing you would set up a “one off” wargame to achieve.   It was not pre planned in the PBEM campaign.  It highlights the advantage of allowing six players to plan their own campaign strategy and allow them freedom to take risks.   It has produced one of the most interesting wargames we have ever fought.

And it has provided a real interesting twist to the campaign.   If this were a solo campaign I would end the Gera phase here and move on to the next phase of the campaign.   Given that the aim of the campaign is to produce good wargames there would be little point in struggling to continue with four Russian corps against three French.    But it is not a solo campaign, and the choice is not mine.

I have left the decision to the campaign players.   The Russian commanders have, predictably, all confirmed that they want to continue.  The French have not been so quick to respond.  One of the three is now without a command, but I have offered him the French reserve which I had run previously.   A second has said he would like to continue, but does not know what to do.  A third has not responded yet.

I do have a “clever plan” for the French.  But it will be a lot of work to set up, and I need to be sure that the French players are willing to continue in the circumstances.   If not, then I will have to start work immediately on the next phase of the campaign.  So all work has been suspended on the proposed Italian campaign for the present.
Tuesday 24 July 2012

Maps for Campaigns of Napoleon


Strategic map of Italy

It’s been a very frustrating week as I struggle to produce suitable maps for my proposed new series of wargames based on the campaigns of Napoleon.

I have decided that I will start with his first campaign in Italy.   It was fought in 1796 in Piedmont.   The first campaign will be based on the period in April when he defeated the Sardinian army of general Colli, supported by the Austrian army of general Beaulieu.

I have read a bit about the campaign, but I would not say I know it well.   So I turned to Esposito’s  “History and Atlas of the Napoleonic Wars”.  I have had a hard back volume for more than 30 years, and it is one of the most used books in my collection. 

The maps for my 1813 campaign are all based on the maps in the AA Road Atlas of Europe.   I have drawn a grid with 20 miles per square, which represents one day s march and one wargames table.  I then created maps of northern Europe and Spain using ProFantasy.    This was fine for my PBEM campaign, where I am not trying to recreate actual campaign areas

I did not have one for Italy, so most of last week was devoted to making one on ProFantasy.   The result can be seen above.    It’s not difficult to do, but it does take some time.   I know how many squares are required as they are drawn in the AA Atlas.  So I just have to take the name of the largest town in each square and type it on the ProFantasy map.  This gave me a map of Italy and part of Spain, with each square representing one days march or one wargame table.

Tactical map of Piedmont

I then outline the proposed campaign area.   I then have to make a new map, which will be the campaign tactical map.  This has nine squares for each one on the larger map, and each square is a 2x2 foot square on my wargames table.  And this is where it gets difficult.

Because my wargames table consists of scenic squares, all the roads and rivers have to exit the square in the centre of one side, so that they will join the next square.  All hills have to be restricted to one 2x2 foot square.   Finally there are a limited number of available squares, 21 at present.   Any scenery I include on the tactical map has to meet this restriction.

And this is the end result.   It works for the wargame, but does not look very pretty.   Nor does it bear much resemblance to Esposito’s map of the campaign.   This is because the towns of Montenotte and Dego were the scene of historical battles, they are too small to feature on a present day AA Atlas of Europe!

So it’s back to the drawing board.   I have no idea how I will solve the problem, but I am considering whether it might be possible to use Malcolm McCallum’s excellent campaign maps murat.ca/maps.htm

I have considered them before, but could not match the distances with my AA maps, nor the road and river system with my scenic boards.   On the other hand it includes national borders and terrain features, both of which are very difficult to research.   I am not sure how accurate they are, but that does not matter too much.   Anything I design will be based on guess work anyway.

Tuesday 17 July 2012

Campaigns of Napoleon


For some time I have been considering how I would replace my Wellington’s Battles series of wargames.   These were loosely based on Wellington’s battles in the Peninsula, and filled the gap between campaign games.  We fought 14 wargames in the series from November 2009 to May this year. 

Since then I have been pondering whether I could fight a series of wargames based on Napoleon’s battles.  But on closer examination I realised that, unlike Wellington, Napoleon fought very big battles.   Apart from Waterloo, most of Wellington’s battles were corps sized.   Most of Napoleon’s are very much multi corps.  

I am now considering whether I might fight a series of wargames based on Napoleon’s campaigns rather than his battles.   Each would be based in the same area, but would have different orders of battle and would be mini campaigns in their own right.

At present I am in the early stage of looking at his 1796-97 Italian campaigns. 

It’s a large area to map, and my first impression is that it would need to be fought in at least two phases.   First campaign might be for Milan.  Second in Lake Garda area.

I do not have any early Napoleonic figures, and do not intend to extend my collection to cover them.  So it would be fought in 1812 style uniforms.   Would not worry me, though it might offend the Napoleonic purists.

I could use my Spanish scenery, which are similar in style to Italian buildings.

Given how long it took me to fight the 14 Wellington battles, this would be a very very long term project.    And I am not really sure that I want to commit to such a large task.

My PBEM campaign will continue to be my main interest, and will take priority over anything else.  

I am undecided because it seems like a lot of work just to provide the occasional one off wargame.  I have considered just fighting one of Napoleon’s popular mini campaigns, such as Bavaria 1809.    But that seems too similar to the PBEM campaign.

I have also considered expanding the PBEM to include the whole campaign area of Germany and Spain, rather than just one phase at a time.   I could then enlarge the number of players and each would have a number of corps to command.   But it relies too much on the dedication and commitment of the players, and I have learned in the past that it is very difficult to determine these things when playing online.

So it is all a pipe dream for the present.   But I like the idea of related wargames, and I do need something to take the place of Wellington’s Battles.

Sunday 8 July 2012

Gera PBEM Campaign


We have finally finished the three battles and resumed the campaign proper.  

The wargames, plus short holidays, have taken seven weeks to complete.  It’s a long time between order writing, and I was expecting some teething problems getting back into the routine.  I was not disappointed.

For Jan and I the campaign is fast moving and time consuming.   Every day I work on the campaign, though not always the current phase.   I spend a lot of time working on new maps, and adjusting wargame and campaign rules. 

When there is a battle we try to fight one wargame move each day.   This may not seem a lot, but it is not just a matter of the table top move.  I also have to take photos at the start of the move, and one of each division involved.  I then have to type up the battle report.   It all takes about two hours each day.

One battle takes twelve moves, so allowing for real life it takes about two weeks to wargame.   This is a long time between order writing, so to keep the players involved and interested I post one move on the campaign diary each day.

So after three battles fought during the same campaign period the campaign players had a six week break between writing orders.   I was quite expecting there would be problems getting back into the 48 hour turn around for order writing, and I proved to be the case.

The campaign system is that I send each player an umpire report on the previous period or in this case at the end of his campaign battle.  This report consists of a map showing his locations and enemy divisions in contact.  It also confirms his supply state and his casualties.   When he receives this report he then has 48 hours to write his orders for the next campaign move.  

It would be hard to make the player task any easier.   Even if he has not kept up with the battle report on the campaign diary blog, he still has all of the information he needs in the umpire report.     If he is unable to write his orders for any reason he only has to let me know, and I will write them for him.   Despite this there is always one or two players who fail to send in their orders on time, and who require a reminder.

This time there were two players who failed despite the reminder.  When this happens I normally assume that they have lost interest and replace them.  But because of the unusual break in the routine I sent a second reminder.   To my surprise both replied immediately.  

So my concerns that I might well have to replace one or two players after the seven week break has proved unfounded.   All are still on board and the campaign is entering a very interesting phase where most of the corps have casualties and the corps commanders have to make some difficult decisions.

Sunday 1 July 2012

Visit to Zaragoza


Zaragoza from the north bank of the river Ebro

We have just returned from a four day coach trip to Zaragoza and Teruel.   We have driven through Aragon before when we moved from UK to Spain, but this was our first real visit.  We were particularly interested in Zaragoza, and looking forward to finding any locations related to the siege in 1808.

It was a disappointment to find that the tourist information had very little to offer.   They told us there was a statute to the “Maid of Aragon” who fired the cannon at the French when her gunner lover/husband was struck down.  

There was also one of the original town gates called Puerto del Carmen.  It is now a traffic island in the middle of the three lane Paseo de Pamplona.

But most of the southern part of the city had been destroyed in the fighting.   The northern part, near the river Ebro, remains and is now the main tourist attraction.  But it played no part in the street fighting which was so much a part of the siege.   And it was out of range of the French artillery deployed to the south, east and west.

This was pretty much what I had expected.  

I had a map of the city during the siege with me, and after some discussion the tourist information  suggested that I try Calle Doctor Palomar.   This is one of the few remaining sections of the old city, and there are a couple of buildings with musket and cannon damage from the fighting.

Calle Coso

Our hotel was on the famous Calle Coso, which marked the furthest point reached by the French during the fighting.   The inner city to the north was held by the Spanish until the final surrender.   This is now the “tourist Zaragoza”.

It was disappointing to walk along this road which I had read so much about, and find a wide impersonal city centre street such as you might find in any large city.   Nothing at all to evoke images of the desperate fighting.

River Huerva

We did however find the river Huerva, which marked the outer limit of the old city.  It is now a small park, and provided welcome relief from the high afternoon temperatures.

Calle Doctor Palomar 

Calle Doctor Palomar we found to be just what we had hoped to find.   Parts have been rebuilt, but much of the original remains.   Better still it has the same narrow streets which feature so much in descriptions of the battle.   In the photo above Jan is looking at the musket marks on the large building on the right.

We took lots of photographs, but most too specialist to make much sense without a detailed description.  So perhaps I will start another section of our “Walking Napoleonic Battlefields” to cover those we have visited on day trips since we moved to Spain six years ago.

You will find more photographs of our visit on our blog “Paul and Jan in Spain 2012” at:

Zaragoza is well worth a visit, but do come prepared if you want to find the city of 1808.